If you run into the error [ngRepeat:dupes] when you try to use angularjs combined with local storage, you might want to read this article that explains why this happens, and how you can resolve this issue.
Latest Entries »
A very interesting podcast about staying (at least trying to stay) healthy while being a tech worker.
My favourite quotes:
Working two jobs is usually terrible for your health
What you eat affects your health and mood in a bigger way than going to the gym does. You can’t compete with what you eat.
Get as much sleep as you need. Be consistent about your sleeping schedule if you can
Don’t rely on willpower. Use planning instead.
You will have bad days. Don’t give up.
Want to listen to the whole podcast? Her’s the link: 037: Health – CodePen Blog.
Have you ever used a background texture in your projects, presentations, wep pages, etc.? Most of us did.
If you’re in a rush, and you need something quick, you can easily google it and find online some great resources for textures and patterns.
One for all, I could suggest subtlepatterns.com where there’s an incredible amount of high quality tilable textured patterns, and best of all they are free to use (as long as you keep the proper credits!! Pretty fair, I’d say)
But you have another option: GIMP.
Yes, using this great free software you can have your own textures in just a few simple steps, and furthermore, making your textures seamless is just a click away!
Want to know how? Check this excellent tutorial from Vicki Wenderlich: she explains all the steps in a clear way, and she’ll easily lead you to your first seamless texture.
There may be a time, in your life, when you need to compare two text files on a linux server, and all you have is a CLI (Command Line Interface). How can this be done? Well, it’s a pretty easy task (when you know how to do it!)
All you need is the diff command, and this is how you use it:
diff [first-file] [second-file]
Is it that easy?!? The answer is: YES!
So, for example, let’s say we have two style sheets on our webserver, style1.css and style2.css, and we want to compare them. We will use the following command:
diff style1.css style2.css
and this is what we’ll get in return:
140c138
< color: #999;
---
> color: #666;
What is diff trying to tell us? That line 140 of our first file (style1.css) contains the text color: #999; while line 138 of the second file (style2.css) is different and contains color: #666;.
Did you notice the < and > characters at the beginning of the lines? They indicate which file they refer to: < for the first file, > for the second.
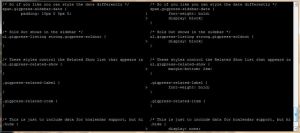
If you have the chance to widen the window of your terminal (at least 126 columns), you may like the -y option, that will display a two column output, with the two files side by side:
diff -y [first-file] [second-file]
In the process of exploring GIMP, trying to create new background textures for some future works, I came up with the following steps that usually give satisfying results (to me!):
1. first of all, create a new image with a solid colored background;

2. add some noise, using any of the following Filters:
-> Noise -> Casual (set a 5-6%)
-> HSV Noise (Holdness=2; Hue=3; Saturation=20; Value=20);

3. apply Filters -> Artistic -> Apply canvas (depth 3-5);
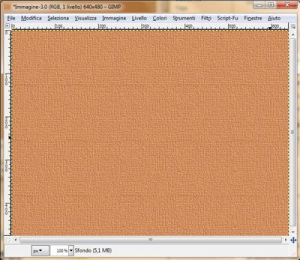
4. at this point, you can add some other Artistic filters, such as Oilify (mask dim.<8) or GIMPressionist (Paper=defaultpaper; Scale=30; Relief=6);

5. now create a new level;
6. choose a non-solid brush, set its opacity at 50% and start drawing casually on the new layer using a white color;


7. repeat pt. 5 and 6, this time using a black color;
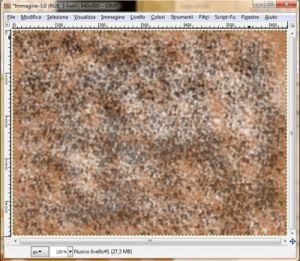
8. now set these two last levels mode to overlay with an opacity of 50-60%.

There you go. Play with the settings of each filter, and you’ll probably come up with an interesting texture on which you can start creating your content.
I have been looking at this blog from a “reader” point of view, and… oh my goodness, what a mess!!!!
I keep changing topics: one day I post computer stuff, like howto’s and tech tips, then I skip over and talk about music, then again I whine and whimper with my personal thoughts…
There is no overall direction, no central thread, no main subject… posts are pretty much unrelated, a bunch of disconnected thoughts that simply happen to meet in this common container.
But, if I stop long enough to think about it, I must admit that this should be no real surprise.
This is exactly how I am.
This is truly how my current life looks like: a cluster of unrelated events that clog up my days and make me skip constantly between my job, my passions, my duties, my worries and my ideas…
No, this blog is not just a mess… it’s a faithful picture of my life.
I have heard many times words on the importance of good practice, and how you should always remember that every note, every single passage or musical phrase has it’s own importance and life, and how you should always try and connect everything to capture the full vision of what you’re playing, without substantial differences between practice and performance.
Well, I found that Joshua Roman has a very interesting point of view on this subject: read his full post here

Today I was trying to open a big .rar file when I ran into am unexpected “low disk space” warning.
What??!!?? Low space??? How the hell did I fill up all of my 200GB disk?!?!?
Further investigation led to this: there is a folder called winsxs inside the Windows directory that takes up a LOT of space (in my case it was about 12GB!). I never heard of it before, so I searched the web for more info about it, and this is what i found.
The Windows component store (C:\Windows\winsxs) directory is used during servicing operations within Windows installations. Servicing operations include, but are not limited to, Windows Update, Service Pack and hotfix installations). The component store contains all of the files needed for a Windows installation and any updates to those files are also held within the component store as they are installed.
Read the rest of the Microsoft Technet article here.
In other words, the ‘winsxs‘ folder is used to store all install and uninstall files, windows packages (not only the current version of a component, but also the previous ones) and out-of-band releases. Therefore you should expect it’s content to grow constantly through time.
But there’s something you can do to shrink it’s size and gain back some of your vital space.
If you like to work with the command line, and you have SP1 installed (required!!), you can run this command (in elevated/admin mode):
dism /online /cleanup-image /spsuperseded
In my case, it helped me reduce it from 12GB to 7GB!! Not bad, uh??
It’s a few months I have been using Soundcloud to share my music tracks, but I found out just now that there’s an option that allows an easy integration of those tracks here on my blog (read more on this article).
So here is my latest track, it’s the Kyrie from the Missa for 4 Voices of the English composer William Byrd (1540-1623), recorded in multitrack in my home studio.
Enjoy! (And don’t forget to explore my other music on Soundcloud)
First of all, let me start by saying I am not a professional graphics editor or such, so this how-to might be total nonsense to a pro. But it works for my goals.
That being stated, let me show you how to create a fancy background using GIMP and some simple techniques.
1. Let’s start with an empty image. Since we’re going to have a filled background, I usually start with a white layer
File > New… > 800×400 (or whatever size you need)
2. Now we can start and fill the layer using the blend tool.
Tools > Drawing > Blend
Set the mode to “Difference“, choose a multicolored gradient (anyone you like, as long as it has more than 2 colors; I’m going to use the “Shadow 3” preset in this example), set any form you like (linear, radial or else) and start filling freely, changing directions each time. This is what I get after drawing about 10-15 gradient lines.
 using only linear gradients |
 using just radial gradients |
When you’re happy with the result, you can jump to the next step.
3. Turn everything to black and white using the Desaturate tool.
Colors > Desaturate
Choose the options that give you the result you prefer (I have been using the Lightness option)

desaturated image
4. Now you can apply a last finishing touch using the blend tool again. This time change the mode to “Soft light” and use a gradient with a combination of soft colors.
Check the examples below.

